If you’ve recently gotten a home freeze dryer (like our customers rave about), you’re probably already thinking about all the ice cream, berries, leftover pizza, even your morning coffee grounds you want to preserve. But here’s the thing—loading that dryer isn’t just shoving trays full of food in and hitting go. Do it wrong, and you’ll end up with soggy, half-frozen junk that’s a waste of time, money, and the good strawberries you picked. As someone who’s been selling home freeze dryers for years, I’ve seen every loading mistake in the book. From people overpacking trays so tight air can’t circulate to tossing in warm leftovers straight from the fridge (yikes, that’s a freezer burn disaster waiting to happen). Today I’m breaking down what actually works—no fancy lab jargon, just real, tested tips that’ll make your freeze-dried stuff look like the store-bought kind, but way better. Home Freeze Dryer
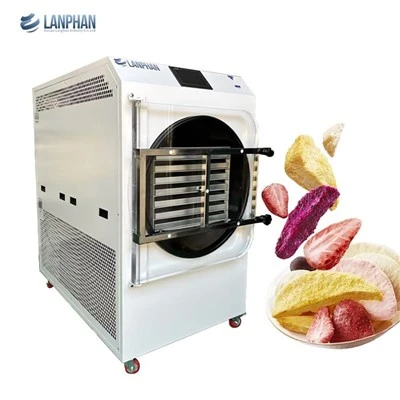
First, let’s talk about the biggest rule you need to follow: less is more. Wait, what? But I want to fit so much food in! I get it. I’ve had customers call me panicking because their blueberries won’t all fit on two small trays. Here’s the science behind that: freeze drying works by pulling ice from food directly into vapor (sublimation, if you want to get technical) and pumping that vapor out of the chamber. For that to happen, dry, cold air has to move through every single spot on the tray. If you pile blueberries so thick they’re stacked three deep, or spread a batch of mashed potatoes in a layer thicker than a quarter, the air can’t reach the bottom. You’ll end up with a top layer that’s perfectly freeze-dried and a bottom layer that’s still mushy and wet. It’s not worth it. For small, single-ingredient items like berries or grapes, a single layer, spaced just enough apart so they don’t touch, works best. For larger, denser stuff like slices of apple or banana, a thin layer, no more than half an inch thick, is ideal. Even for snacks like chopped nuts, don’t fill the tray all the way—leave a little space at the edges so air can flow around. I tell all my new customers: if you’re questioning if it’s too much, it’s probably not enough. Start with a light load, test it, and you’ll get the hang of it fast.
Next up: prep your food before you even touch the trays. I know, you’re excited to load, but cutting, blanching, or patting dry can make all the difference. Let’s take veggies, for example. If you toss raw broccoli straight on the tray, the thick stems hold a ton of water, and they’ll take forever to freeze dry. Blanch them first—dunk in boiling water for a minute, then immediately into ice water—to break down the cell walls. That lets the water escape way faster, so your dryer finishes the job in half the time. For fruits? Slicing them thin helps, too. A ¼-inch thick apple slice will freeze dry in about 20 hours, while a 1-inch thick chunk could take 30+ and risk going bad mid-cycle. And if you’re dealing with juicy stuff like tomatoes or peaches? Pat ’em dry with a paper towel first. All that extra surface moisture on the outside will turn into a big, icy blob that takes forever to sublimate. I once had a customer load a whole tray of fresh peaches without patting them, and half the tray ended up as one giant, frozen peach popsicle stuck to the tray. No joke—she called me at 2 a.m. panicking, thinking her dryer was broken. Moral of the story: prep = faster, better results.
Now, let’s chat about temperature. This is another huge mistake I see all the time. People take food straight from the fridge or countertop and plop it on the freezer dryer trays. Nope! Food needs to be frozen solid before it goes into the home freeze dryer. Wait, why? Because sublimation only works when the food’s ice is super cold. If your food is even a little bit warm when you load it, you’ll get frost buildup on the chamber walls, which messes up the vacuum and makes the cycle way longer. Let’s do the math: if you load warm mac and cheese straight from the stove, the top layer might freeze, but the inside stays slushy. Then the dryer has to work overtime to cool it down, and by the time it’s done, your mac and cheese is gummy instead of light and crispy. My go-to trick: prep your food, spread it on trays, and stick it in your regular freezer for 12 to 24 hours before loading it into the freeze dryer. That way, every single bit is rock solid, no frost on the surface, and the freeze dryer can do its job without wasting time. I also tell customers not to overcrowd their regular freezer when prepping—leave space between the trays so air circulates there too, otherwise the food won’t freeze evenly.
Here’s one that surprises people: tray preparation. Wait, the trays are already part of the dryer, right? But how you arrange the trays inside the chamber matters. Most home freeze dryers have multiple trays stacked on a central rack. If you stack them so close together there’s less than an inch between each tray, air can’t move up and down through the chamber. That means the top tray might dry perfectly, but the bottom tray will be stuck with extra moisture. My advice: leave at least an inch of space between every tray. Even better? Rotate the trays halfway through the cycle, if your dryer lets you. I have an older model, so I just swap the top and bottom trays after 10 hours, and it evens out the drying time every single time. Also, if your trays have any holes (which most do), don’t line them with parchment paper. Parchment traps moisture, so water can’t escape through the holes. If you’re worried about small food items falling through, use a mesh liner—they’re cheap, reusable, and let air and vapor flow through. I sell these mesh liners as an add-on, and customers swear by them for berries and tiny veggies.
What about common “problem” foods? I get asked about this all the time. Things like creamy dips, cooked meat, even ice cream. Let’s start with cooked meat. A lot of people want to freeze dry leftover burgers or chicken for camping, right? Load meat in thick slices, just like other dense foods. But also, pat off all the excess grease first. Grease is oil, not water, so freeze drying doesn’t remove it. If you leave grease on your meat, it’ll go rancid over time, even in the freeze-dried state. Creamy dips like hummus or ranch? Spread them thin—no more than ⅛ of an inch thick. And stir them halfway through the cycle, when they’re semi-frozen, to break up any big chunks so everything dries evenly. Ice cream is a fun one: scoop it into small balls, put them on a tray, and freeze solid. They’ll freeze dry in about 12 hours, and you’ll have tiny, crunch ice cream bites perfect for kids or snacking on hikes. Just don’t overcrowd them—leave space so they don’t stick together.
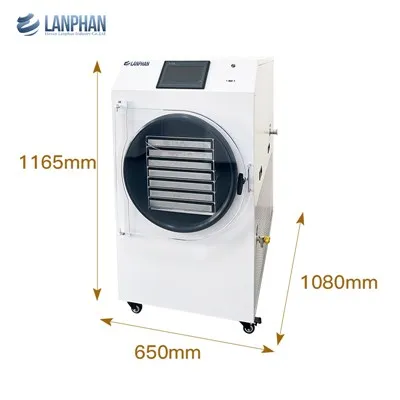
Wait, let’s bust a myth really quick. Some people think overloading the dryer at once is fine, because it’s a big machine. No, not really. Home freeze dryers are designed for a specific amount of food, usually between 5 and 10 pounds per cycle, depending on the model. If you stuff 15 pounds into a cycle, you’re stretching it too thin, and some parts will just not dry. You’ll end up wasting electricity and time with a half-batch. I always tell customers: do a little extra prep, do two smaller cycles, and you’ll get way better results than one overstuffed cycle. It’s better to be patient than to throw out a whole tray of food because you rushed the loading.
Another thing: how to handle small items. Things like coffee beans, spices, even chocolate chips. Coffee beans: whole beans work great, and they keep their flavor way longer than regular ground coffee. I recommend leaving them whole, no need to chop. Spices: you can freeze dry herbs like basil or mint to make them extra concentrated—just pick the leaves, wash them, pat dry, spread thin, and freeze. They’ll dry in about 10 hours, and when you rehydrate them, they taste just like fresh. Chocolate chips: toss them whole, they get crunchy, like candy. Just don’t load them next to juicy fruits, because moisture might transfer (we’ve all had that chocolate chip that tastes like strawberries, not ideal).
Let me also talk about what not to do. I’ve seen people load wet sponges, leftover coffee, even open cans of soup. None of that works, for obvious reasons. Also, don’t mix too many different types of food on one tray. Juicy fruit on the same tray as dry nuts will make the nuts taste like fruit, and that’s not usually what you want. Keep similar moisture content foods together. Berries with other berries, veggies with veggies, meat with meat. That way, they all dry at the same rate, and you don’t end up with some things done and others still wet.
Now, after loading, a quick check. Once you’ve arranged all the trays, put them in the chamber, seal it, and start the cycle—but wait, before you seal, take 10 seconds to look around. Did any food spill onto the edges of the trays? If so, wipe it off with a dry cloth. Spilled food can cause frost buildup on the chamber seal, which will break the vacuum and mess up the cycle. Also, make sure the tray rack is locked in place so trays don’t shift during the cycle. Small things, but they add up.
I know it can feel overwhelming at first. When I first started selling these dryers, I messed up loading my first batch of strawberries. I piled them three deep, they took 30 hours to dry, and half were still mushy. I learned from it, and now I load every batch with that tip in mind. The best part about home freeze dryers is that they let you save food that would otherwise go bad—from summer berries to Thanksgiving leftovers to your grandma’s famous cookies. But the loading part is what makes that pay off.
If you’re just getting started with your home freeze dryer, and you’re nervous about messing up a batch, don’t hesitate to reach out. We’re here to help with loading tips, cycle times, even recipe ideas. Whether you need help figuring out how to arrange that tray of sliced bananas or what to do with a batch of leftover chili, we’re just a message away. Don’t let a bad loading job turn you off from all the amazing stuff freeze drying can do.
Now, go grab that food, prep it, load it light, and get ready for some perfectly crisp, shelf-stable treats that will last for years.
Home Freeze Dryer References
- "Freeze Drying Fundamentals: Sublimation and Process Parameters" – Journal of Food Processing and Preservation
- "Home Freeze Drying Best Practices for Household Food Preservation" – National Center for Home Food Preservation
- "Optimizing Load Configurations for Small-Scale Freeze Drying" – Food and Bioproducts Processing
Henan Lanphan Industry Co., Ltd.
We’re well-known as one of the leading home freeze dryer suppliers in China, featured by quality products and good price. Please rest assured to wholesale durable home freeze dryer for sale here from our factory. For more information, contact us now.
Address: Room 801, East Tower, Xiyuan Square, Zhongyuan District, Zhengzhou City, Henan Province
E-mail: lanphanindustry@lanphan.com
WebSite: https://www.lanphanindustry.com/
